Android框架练成_教你打造高效的图片加载框架
原文出处:Android 框架练成 教你打造高效的图片加载框架
1、概述
优秀的图片加载框架不要太多,什么UIL , Volley ,Picasso,Imageloader等等。但是作为一名合格的程序猿,必须懂其中的实现原理,于是乎,今天我就带大家一起来设计一个加载网络、本地的图片框架。有人可能会说,自己写会不会很渣,运行效率,内存溢出神马的。放心,我们拿demo说话,拼得就是速度,奏事这么任性。
好了,如果你看过之前的博文,类似Android Handler 异步消息处理机制的妙用 创建强大的图片加载类,可能会对接下来文章理解会有很大的帮助。没有的话,就跟我往下继续走吧,也不要去看了。
关于加载本地图片,当然了,我手机图片比较少,7000来张:
1、首先肯定不能内存溢出,但是尼玛现在像素那么高,怎么才能保证呢?我相信利用LruCache统一管理你的图片是个不二的选择,所有的图片从LruCache里面取,保证所有的图片的内存不会超过预设的空间。
2、加载速度要刚刚的,我一用力,滑动到3000张的位置,你要是还在从第一张给我加载,尼玛,你以为我打dota呢。所以我们需要引入加载策略,我们不能FIFO,我们选择LIFO,当前呈现给用户的,最新加载;当前未呈现的,选择加载。
3、使用方便。一般图片都会使用GridView作为控件,在getView里面进行图片加载,当然了为了不错乱,可能还需要用户去自己setTag,自己写回调设置图片。当然了,我们不需要这么麻烦,一句话IoadImage(imageview,path)即可,剩下的请交给我们的图片加载框架处理。
做到以上几点,关于本地的图片加载应该就木有什么问题了。
关于加载网络图片,其实原理差不多,就多了个是否启用硬盘缓存的选项,如果启用了,加载时,先从内存中查找,然后从硬盘上找,最后去网络下载。下载完成后,别忘了写入硬盘,加入内存缓存。如果没有启用,那么就直接从网络压缩获取,加入内存即可。
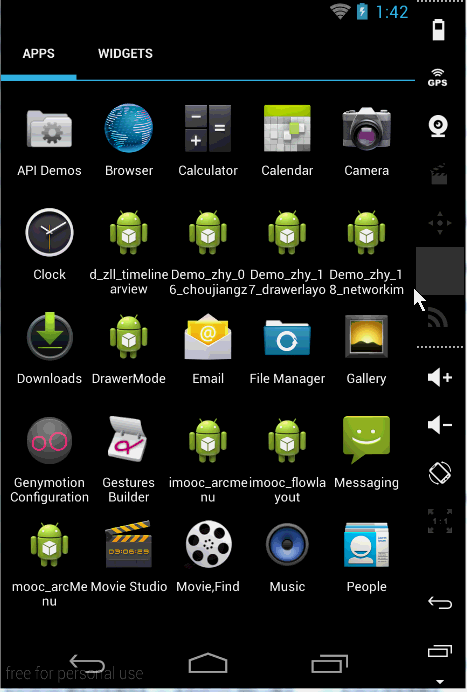
2、效果图
终于扯完了,接下来,简单看个效果图,关于加载本地图片的效果图:可以从Android 超高仿微信图片选择器 图片该这么加载这篇博客中下载Demo运行。
下面演示一个网络加载图片的例子:
80多张从网络加载的图片,可以看到我直接拖到最后,基本是呈现在用户眼前的最先加载,要是从第一张到80多,估计也是醉了。
此外:图片来自老郭的博客,感谢!!!ps:如果你觉得图片不劲爆,Day Day Up找老郭去。
3、完全解析
1、关于图片的压缩
不管是从网络还是本地的图片,加载都需要进行压缩,然后显示:
用户要你压缩显示,会给我们什么?一个imageview,一个path,我们的职责就是压缩完成后显示上去。
1、本地图片的压缩
a、获得imageview想要显示的大小
想要压缩,我们第一步应该是获得imageview想要显示的大小,没大小肯定没办法压缩?
那么如何获得imageview想要显示的大小呢?
/**
     * 根据ImageView获适当的压缩的宽和高
     *
     * @param imageView
     * @return
     */
    public static ImageSize getImageViewSize(ImageView imageView)
    {
        ImageSize imageSize = new ImageSize();
        DisplayMetrics displayMetrics = imageView.getContext().getResources()
                .getDisplayMetrics();
        LayoutParams lp = imageView.getLayoutParams();
        int width = imageView.getWidth();// 获取imageview的实际宽度
        if (width <= 0)
        {
            width = lp.width;// 获取imageview在layout中声明的宽度
        }
        if (width <= 0)
        {
            // width = imageView.getMaxWidth();// 检查最大值
            width = getImageViewFieldValue(imageView, "mMaxWidth");
        }
        if (width <= 0)
        {
            width = displayMetrics.widthPixels;
        }
        int height = imageView.getHeight();// 获取imageview的实际高度
        if (height <= 0)
        {
            height = lp.height;// 获取imageview在layout中声明的宽度
        }
        if (height <= 0)
        {
            height = getImageViewFieldValue(imageView, "mMaxHeight");// 检查最大值
        }
        if (height <= 0)
        {
            height = displayMetrics.heightPixels;
        }
        imageSize.width = width;
        imageSize.height = height;
        return imageSize;
    }
    public static class ImageSize
    {
        int width;
        int height;
    }
可以看到,我们拿到imageview以后:
首先企图通过getWidth获取显示的宽;有些时候,这个getWidth返回的是0;
那么我们再去看看它有没有在布局文件中书写宽;
如果布局文件中也没有精确值,那么我们再去看看它有没有设置最大值;
如果最大值也没设置,那么我们只有拿出我们的终极方案,使用我们的屏幕宽度;
总之,不能让它任性,我们一定要拿到一个合适的显示值。
可以看到这里或者最大宽度,我们用的反射,而不是getMaxWidth();维萨呢,因为getMaxWidth竟然要API 16,我也是醉了;为了兼容性,我们采用反射的方案。反射的代码就不贴了。
b、设置合适的inSampleSize
我们获得想要显示的大小,为了什么,还不是为了和图片的真正的宽高做比较,拿到一个合适的inSampleSize,去对图片进行压缩么。
那么首先应该是拿到图片的宽和高:
// 获得图片的宽和高,并不把图片加载到内存中
        BitmapFactory.Options options = new BitmapFactory.Options();
        options.inJustDecodeBounds = true;
        BitmapFactory.decodeFile(path, options);
这三行就成功获取图片真正的宽和高了,存在我们的options里面;
然后我们就可以happy的去计算inSampleSize了:
/**
     * 根据需求的宽和高以及图片实际的宽和高计算SampleSize
     *
     * @param options
     * @param width
     * @param height
     * @return
     */
    public static int caculateInSampleSize(Options options, int reqWidth,
            int reqHeight)
    {
        int width = options.outWidth;
        int height = options.outHeight;
        int inSampleSize = 1;
        if (width > reqWidth || height > reqHeight)
        {
            int widthRadio = Math.round(width * 1.0f / reqWidth);
            int heightRadio = Math.round(height * 1.0f / reqHeight);
            inSampleSize = Math.max(widthRadio, heightRadio);
        }
        return inSampleSize;
    }
options里面存了实际的宽和高;reqWidth和reqHeight就是我们之前得到的想要显示的大小;经过比较,得到一个合适的inSampleSize;
有了inSampleSize:
options.inSampleSize = ImageSizeUtil.caculateInSampleSize(options,
                width, height);
        // 使用获得到的InSampleSize再次解析图片
        options.inJustDecodeBounds = false;
        Bitmap bitmap = BitmapFactory.decodeFile(path, options);
        return bitmap;
经过这几行,就完成图片的压缩了。
上述是本地图片的压缩,那么如果是网络图片呢?
2、网络图片的压缩
a、直接下载存到sd卡,然后采用本地的压缩方案。这种方式当前是在硬盘缓存开启的情况下,如果没有开启呢?
b、使用BitmapFactory.decodeStream(is, null, opts);
/**
     * 根据url下载图片在指定的文件
     *
     * @param urlStr
     * @param file
     * @return
     */
    public static Bitmap downloadImgByUrl(String urlStr, ImageView imageview)
    {
        FileOutputStream fos = null;
        InputStream is = null;
        try
        {
            URL url = new URL(urlStr);
            HttpURLConnection conn = (HttpURLConnection) url.openConnection();
            is = new BufferedInputStream(conn.getInputStream());
            is.mark(is.available());
            Options opts = new Options();
            opts.inJustDecodeBounds = true;
            Bitmap bitmap = BitmapFactory.decodeStream(is, null, opts);
            //获取imageview想要显示的宽和高
            ImageSize imageViewSize = ImageSizeUtil.getImageViewSize(imageview);
            opts.inSampleSize = ImageSizeUtil.caculateInSampleSize(opts,
                    imageViewSize.width, imageViewSize.height);
            opts.inJustDecodeBounds = false;
            is.reset();
            bitmap = BitmapFactory.decodeStream(is, null, opts);
            conn.disconnect();
            return bitmap;
        } catch (Exception e)
        {
            e.printStackTrace();
        } finally
        {
            try
            {
                if (is != null)
                    is.close();
            } catch (IOException e)
            {
            }
            try
            {
                if (fos != null)
                    fos.close();
            } catch (IOException e)
            {
            }
        }
        return null;
    }
基本和本地压缩差不多,也是两次取样,当然需要注意一点,我们的is进行了包装,以便可以进行reset();直接返回的is是不能使用两次的。
到此,图片压缩说完了。
2、图片加载框架的架构
我们的图片压缩加载完了,那么就应该放入我们的LruCache,然后设置到我们的ImageView上。
好了,接下来我们来说说我们的这个框架的架构;
1、单例,包含一个LruCache用于管理我们的图片;
2、任务队列,我们每来一次加载图片的请求,我们会封装成Task存入我们的TaskQueue;
3、包含一个后台线程,这个线程在第一次初始化实例的时候启动,然后会一直在后台运行;任务呢?还记得我们有个任务队列么,有队列存任务,得有人干活呀;所以,当每来一次加载图片请求的时候,我们同时发一个消息到后台线程,后台线程去使用线程池去TaskQueue去取一个任务执行;
4、调度策略;3中说了,后台线程去TaskQueue去取一个任务,这个任务不是随便取的,有策略可以选择,一个是FIFO,一个是LIFO,我倾向于后者。
好了,基本就这些结构,接下来看我们具体的实现。
3、具体的实现
1、构造方法
public static ImageLoader getInstance(int threadCount, Type type)
    {
        if (mInstance == null)
        {
            synchronized (ImageLoader.class)
            {
                if (mInstance == null)
                {
                    mInstance = new ImageLoader(threadCount, type);
                }
            }
        }
        return mInstance;
    }
这个就不用说了,重点看我们的构造方法
/**
 * 图片加载类
 *
 * @author zhy
 *
 */
public class ImageLoader
{
    private static ImageLoader mInstance;
    /**
     * 图片缓存的核心对象
     */
    private LruCache<String, Bitmap> mLruCache;
    /**
     * 线程池
     */
    private ExecutorService mThreadPool;
    private static final int DEAFULT_THREAD_COUNT = 1;
    /**
     * 队列的调度方式
     */
    private Type mType = Type.LIFO;
    /**
     * 任务队列
     */
    private LinkedList<Runnable> mTaskQueue;
    /**
     * 后台轮询线程
     */
    private Thread mPoolThread;
    private Handler mPoolThreadHandler;
    /**
     * UI线程中的Handler
     */
    private Handler mUIHandler;
    private Semaphore mSemaphorePoolThreadHandler = new Semaphore(0);
    private Semaphore mSemaphoreThreadPool;
    private boolean isDiskCacheEnable = true;
    private static final String TAG = "ImageLoader";
    public enum Type
    {
        FIFO, LIFO;
    }
    private ImageLoader(int threadCount, Type type)
    {
        init(threadCount, type);
    }
    /**
     * 初始化
     *
     * @param threadCount
     * @param type
     */
    private void init(int threadCount, Type type)
    {
        initBackThread();
        // 获取我们应用的最大可用内存
        int maxMemory = (int) Runtime.getRuntime().maxMemory();
        int cacheMemory = maxMemory / 8;
        mLruCache = new LruCache<String, Bitmap>(cacheMemory)
        {
            @Override
            protected int sizeOf(String key, Bitmap value)
            {
                return value.getRowBytes() * value.getHeight();
            }
        };
        // 创建线程池
        mThreadPool = Executors.newFixedThreadPool(threadCount);
        mTaskQueue = new LinkedList<Runnable>();
        mType = type;
        mSemaphoreThreadPool = new Semaphore(threadCount);
    }
    /**
     * 初始化后台轮询线程
     */
    private void initBackThread()
    {
        // 后台轮询线程
        mPoolThread = new Thread()
        {
            @Override
            public void run()
            {
                Looper.prepare();
                mPoolThreadHandler = new Handler()
                {
                    @Override
                    public void handleMessage(Message msg)
                    {
                        // 线程池去取出一个任务进行执行
                        mThreadPool.execute(getTask());
                        try
                        {
                            mSemaphoreThreadPool.acquire();
                        } catch (InterruptedException e)
                        {
                        }
                    }
                };
                // 释放一个信号量
                mSemaphorePoolThreadHandler.release();
                Looper.loop();
            };
        };
        mPoolThread.start();
    }
在贴构造的时候,顺便贴出所有的成员变量;
在构造中我们调用init,init中可以设置后台加载图片线程数量和加载策略;init中首先初始化后台线程initBackThread(),可以看到这个后台线程,实际上是个Looper最终在那不断的loop,我们还初始化了一个mPoolThreadHandler用于发送消息到此线程;
接下来就是初始化mLruCache , mThreadPool ,mTaskQueue 等;
2、loadImage
构造完成以后,当然是使用了,用户调用loadImage传入(final String path, final ImageView imageView,final boolean isFromNet)就可以完成本地或者网络图片的加载。
/**
     * 根据path为imageview设置图片
     *
     * @param path
     * @param imageView
     */
    public void loadImage(final String path, final ImageView imageView,
            final boolean isFromNet)
    {
        imageView.setTag(path);
        if (mUIHandler == null)
        {
            mUIHandler = new Handler()
            {
                public void handleMessage(Message msg)
                {
                    // 获取得到图片,为imageview回调设置图片
                    ImgBeanHolder holder = (ImgBeanHolder) msg.obj;
                    Bitmap bm = holder.bitmap;
                    ImageView imageview = holder.imageView;
                    String path = holder.path;
                    // 将path与getTag存储路径进行比较
                    if (imageview.getTag().toString().equals(path))
                    {
                        imageview.setImageBitmap(bm);
                    }
                };
            };
        }
        // 根据path在缓存中获取bitmap
        Bitmap bm = getBitmapFromLruCache(path);
        if (bm != null)
        {
            refreashBitmap(path, imageView, bm);
        } else
        {
            addTask(buildTask(path, imageView, isFromNet));
        }
    }
首先我们为imageview.setTag;然后初始化一个mUIHandler,不用猜,这个mUIHandler用户更新我们的imageview,因为这个方法肯定是主线程调用的。
然后调用:getBitmapFromLruCache(path);根据path在缓存中获取bitmap;如果找到那么直接去设置我们的图片;
private void refreashBitmap(final String path, final ImageView imageView,
            Bitmap bm)
    {
        Message message = Message.obtain();
        ImgBeanHolder holder = new ImgBeanHolder();
        holder.bitmap = bm;
        holder.path = path;
        holder.imageView = imageView;
        message.obj = holder;
        mUIHandler.sendMessage(message);
    }
可以看到,如果找到图片,则直接使用UIHandler去发送一个消息,当然了携带了一些必要的参数,然后UIHandler的handleMessage中完成图片的设置;
handleMessage中拿到path,bitmap,imageview;记得必须要:
// 将path与getTag存储路径进行比较
if (imageview.getTag().toString().equals(path))
{
imageview.setImageBitmap(bm);
}
否则会造成图片混乱。
如果没找到,则通过buildTask去新建一个任务,在addTask到任务队列。
buildTask就比较复杂了,因为还涉及到本地和网络,所以我们先看addTask代码:
private synchronized void addTask(Runnable runnable)
    {
        mTaskQueue.add(runnable);
        // if(mPoolThreadHandler==null)wait();
        try
        {
            if (mPoolThreadHandler == null)
                mSemaphorePoolThreadHandler.acquire();
        } catch (InterruptedException e)
        {
        }
        mPoolThreadHandler.sendEmptyMessage(0x110);
    }
很简单,就是runnable加入TaskQueue,与此同时使用mPoolThreadHandler(这个handler还记得么,用于和我们后台线程交互。)去发送一个消息给后台线程,叫它去取出一个任务执行;具体代码:
mPoolThreadHandler = new Handler()
                {
                    @Override
                    public void handleMessage(Message msg)
                    {
                        // 线程池去取出一个任务进行执行
                        mThreadPool.execute(getTask());
直接使用mThreadPool线程池,然后使用getTask去取一个任务。
/**
     * 从任务队列取出一个方法
     *
     * @return
     */
    private Runnable getTask()
    {
        if (mType == Type.FIFO)
        {
            return mTaskQueue.removeFirst();
        } else if (mType == Type.LIFO)
        {
            return mTaskQueue.removeLast();
        }
        return null;
    }
getTask代码也比较简单,就是根据Type从任务队列头或者尾进行取任务。
现在你会不会好奇,任务里面到底什么代码?其实我们也就剩最后一段代码了buildTask
/**
     * 根据传入的参数,新建一个任务
     *
     * @param path
     * @param imageView
     * @param isFromNet
     * @return
     */
    private Runnable buildTask(final String path, final ImageView imageView,
            final boolean isFromNet)
    {
        return new Runnable()
        {
            @Override
            public void run()
            {
                Bitmap bm = null;
                if (isFromNet)
                {
                    File file = getDiskCacheDir(imageView.getContext(),
                            md5(path));
                    if (file.exists())// 如果在缓存文件中发现
                    {
                        Log.e(TAG, "find image :" + path + " in disk cache .");
                        bm = loadImageFromLocal(file.getAbsolutePath(),
                                imageView);
                    } else
                    {
                        if (isDiskCacheEnable)// 检测是否开启硬盘缓存
                        {
                            boolean downloadState = DownloadImgUtils
                                    .downloadImgByUrl(path, file);
                            if (downloadState)// 如果下载成功
                            {
                                Log.e(TAG,
                                        "download image :" + path
                                                + " to disk cache . path is "
                                                + file.getAbsolutePath());
                                bm = loadImageFromLocal(file.getAbsolutePath(),
                                        imageView);
                            }
                        } else
                        // 直接从网络加载
                        {
                            Log.e(TAG, "load image :" + path + " to memory.");
                            bm = DownloadImgUtils.downloadImgByUrl(path,
                                    imageView);
                        }
                    }
                } else
                {
                    bm = loadImageFromLocal(path, imageView);
                }
                // 3、把图片加入到缓存
                addBitmapToLruCache(path, bm);
                refreashBitmap(path, imageView, bm);
                mSemaphoreThreadPool.release();
            }
        };
    }
    private Bitmap loadImageFromLocal(final String path,
            final ImageView imageView)
    {
        Bitmap bm;
        // 加载图片
        // 图片的压缩
        // 1、获得图片需要显示的大小
        ImageSize imageSize = ImageSizeUtil.getImageViewSize(imageView);
        // 2、压缩图片
        bm = decodeSampledBitmapFromPath(path, imageSize.width,
                imageSize.height);
        return bm;
    }
我们新建任务,说明在内存中没有找到缓存的bitmap;我们的任务就是去根据path加载压缩后的bitmap返回即可,然后加入LruCache,设置回调显示。
首先我们判断是否是网络任务?
如果是,首先去硬盘缓存中找一下,(硬盘中文件名为:根据path生成的md5为名称)。
如果硬盘缓存中没有,那么去判断是否开启了硬盘缓存:
开启了的话:下载图片,使用loadImageFromLocal本地加载图片的方式进行加载(压缩的代码前面已经详细说过);
如果没有开启:则直接从网络获取(压缩获取的代码,前面详细说过);
如果不是网络图片:直接loadImageFromLocal本地加载图片的方式进行加载
经过上面,就获得了bitmap;然后加入addBitmapToLruCache,refreashBitmap回调显示图片。
/**
     * 将图片加入LruCache
     *
     * @param path
     * @param bm
     */
    protected void addBitmapToLruCache(String path, Bitmap bm)
    {
        if (getBitmapFromLruCache(path) == null)
        {
            if (bm != null)
                mLruCache.put(path, bm);
        }
    }
到此,我们所有的代码就分析完成了;
缓存的图片位置:在SD卡的Android/data/项目packageName/cache中:
不过有些地方需要注意:就是在代码中,你会看到一些信号量的身影:
第一个:mSemaphorePoolThreadHandler = new Semaphore(0); 用于控制我们的mPoolThreadHandler的初始化完成,我们在使用mPoolThreadHandler会进行判空,如果为null,会通过mSemaphorePoolThreadHandler.acquire()进行阻塞;当mPoolThreadHandler初始化结束,我们会调用.release();解除阻塞。
第二个:mSemaphoreThreadPool = new Semaphore(threadCount);这个信号量的数量和我们加载图片的线程个数一致;每取一个任务去执行,我们会让信号量减一;每完成一个任务,会让信号量+1,再去取任务;目的是什么呢?为什么当我们的任务到来时,如果此时在没有空闲线程,任务则一直添加到TaskQueue中,当线程完成任务,可以根据策略去TaskQueue中去取任务,只有这样,我们的LIFO才有意义。
到此,我们的图片加载框架就结束了,你可以尝试下加载本地,或者去加载网络大量的图片,拼一拼加载速度~~~
4、MainActivity
现在是使用的时刻~~
我在MainActivity中,我使用了Fragment,下面我贴下Fragment和布局文件的代码,具体的,大家自己看代码:
package com.example.demo_zhy_18_networkimageloader;
import android.content.Context;
import android.os.Bundle;
import android.support.v4.app.Fragment;
import android.util.Log;
import android.view.LayoutInflater;
import android.view.View;
import android.view.ViewGroup;
import android.widget.ArrayAdapter;
import android.widget.GridView;
import android.widget.ImageView;
import com.zhy.utils.ImageLoader;
import com.zhy.utils.ImageLoader.Type;
import com.zhy.utils.Images;
public class ListImgsFragment extends Fragment
{
    private GridView mGridView;
    private String[] mUrlStrs = Images.imageThumbUrls;
    private ImageLoader mImageLoader;
    @Override
    public void onCreate(Bundle savedInstanceState)
    {
        super.onCreate(savedInstanceState);
        mImageLoader = ImageLoader.getInstance(3, Type.LIFO);
    }
    @Override
    public View onCreateView(LayoutInflater inflater, ViewGroup container,
            Bundle savedInstanceState)
    {
        View view = inflater.inflate(R.layout.fragment_list_imgs, container,
                false);
        mGridView = (GridView) view.findViewById(R.id.id_gridview);
        setUpAdapter();
        return view;
    }
    private void setUpAdapter()
    {
        if (getActivity() == null || mGridView == null)
            return;
        if (mUrlStrs != null)
        {
            mGridView.setAdapter(new ListImgItemAdaper(getActivity(), 0,
                    mUrlStrs));
        } else
        {
            mGridView.setAdapter(null);
        }
    }
    private class ListImgItemAdaper extends ArrayAdapter<String>
    {
        public ListImgItemAdaper(Context context, int resource, String[] datas)
        {
            super(getActivity(), 0, datas);
            Log.e("TAG", "ListImgItemAdaper");
        }
        @Override
        public View getView(int position, View convertView, ViewGroup parent)
        {
            if (convertView == null)
            {
                convertView = getActivity().getLayoutInflater().inflate(
                        R.layout.item_fragment_list_imgs, parent, false);
            }
            ImageView imageview = (ImageView) convertView
                    .findViewById(R.id.id_img);
            imageview.setImageResource(R.drawable.pictures_no);
            mImageLoader.loadImage(getItem(position), imageview, true);
            return convertView;
        }
    }
}
可以看到我们在getView中,使用mImageLoader.loadImage一行即完成了图片的加载。
fragment_list_imgs.xml
<GridView xmlns:android="http://schemas.android.com/apk/res/android"
    xmlns:tools="http://schemas.android.com/tools"
    android:id="@+id/id_gridview"
    android:layout_width="match_parent"
    android:layout_height="match_parent"
    android:horizontalSpacing="3dp"
    android:verticalSpacing="3dp"
    android:numColumns="3"
   >
</GridView>
item_fragment_list_imgs.xml
<ImageView xmlns:android="http://schemas.android.com/apk/res/android"
    xmlns:tools="http://schemas.android.com/tools"
    android:id="@+id/id_img"
    android:layout_width="match_parent"
    android:layout_height="120dp"
    android:scaleType="centerCrop" >
</ImageView>
好了,到此结束~~~有任何bug或者意见欢迎留言~
-----------------------------------------------------------------------------
博主部分视频已经上线,如果你不喜欢枯燥的文本,请猛戳(初录,期待您的支持):
2、Android自定义控件实战 打造Android流式布局和热门标签